The Journey of Welcome to the Club – part I – The Butlers
You know how in some movies they have this dream sequence, when looking back on their achievements? This is probably not it, but at least it’s an overview of small frames that make me proud of what I’ve done with great music on the background… as great as you can choose.
I want to tell you about my past year, the ups and downs, the stories behind every piece and decisions that I had to take. It’s easy to talk about them, now that every problem has been solved, and all I have to do is keep them going. But there were some difficulties along the way that I look fondly back on now. This “story” started on the 26th of March 2015 and went on until 30th of January 2016… but I dare say it’s still an ongoing story and there is much more to say.
I had just started my own studio in the beginning 2015 and was doing well, developing concepts for new pieces. But I wanted a reason to produce them all at the same pace, and present them all in the same space, so people could understand the connection between them. I needed to find a local place so logistics wouldn’t be a problem, a place where design and art would be taken seriously and enjoyed. SHOWME Gallery was the perfect match, a gallery used to exhibit big creative names such as Anton Alvarez, Fernando Brizio, Tom Price, Pepe Heykoop, to Alvaro Catalan de Ocon. Also the exclusive geographic location where it stands preserved by the nature around it and combined with the history of the restored buildings, bringing art and design to life in a way you can seldom experience. I would be lying If I say that making this “partnership” happen was a big and difficult journey, because since our first conversation on the 26th of March the gallery loved the idea, and we immediately started working on a possible exhibition date. So the story I will be telling is about the journey that involved the production of all the pieces on the Welcome to the Club exhibition, The Butlers, Kaleidoscope, Sharks, The Zoo Collection and the Pico.
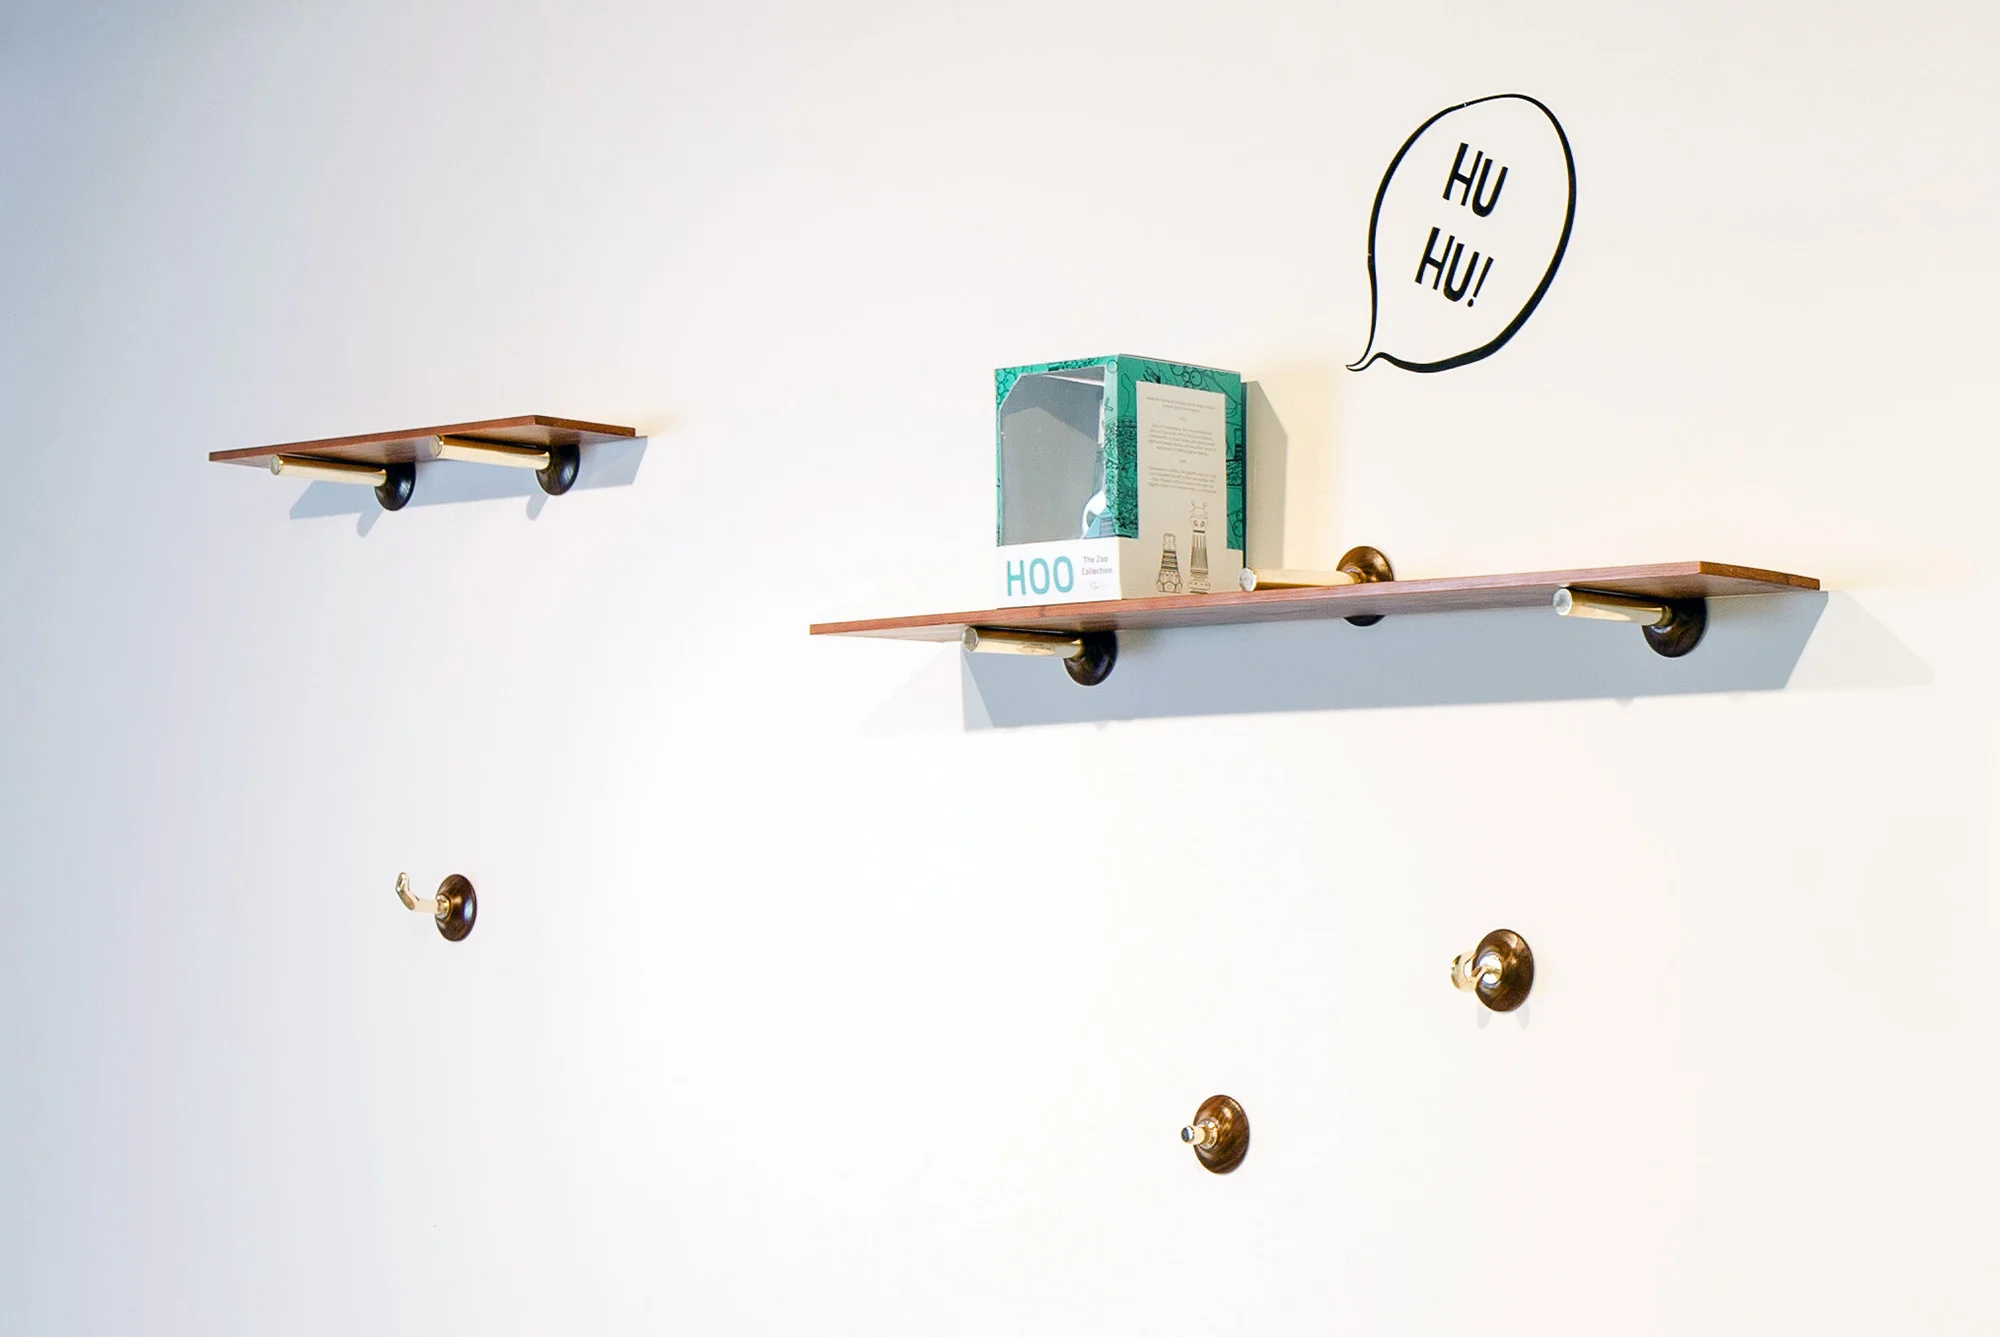
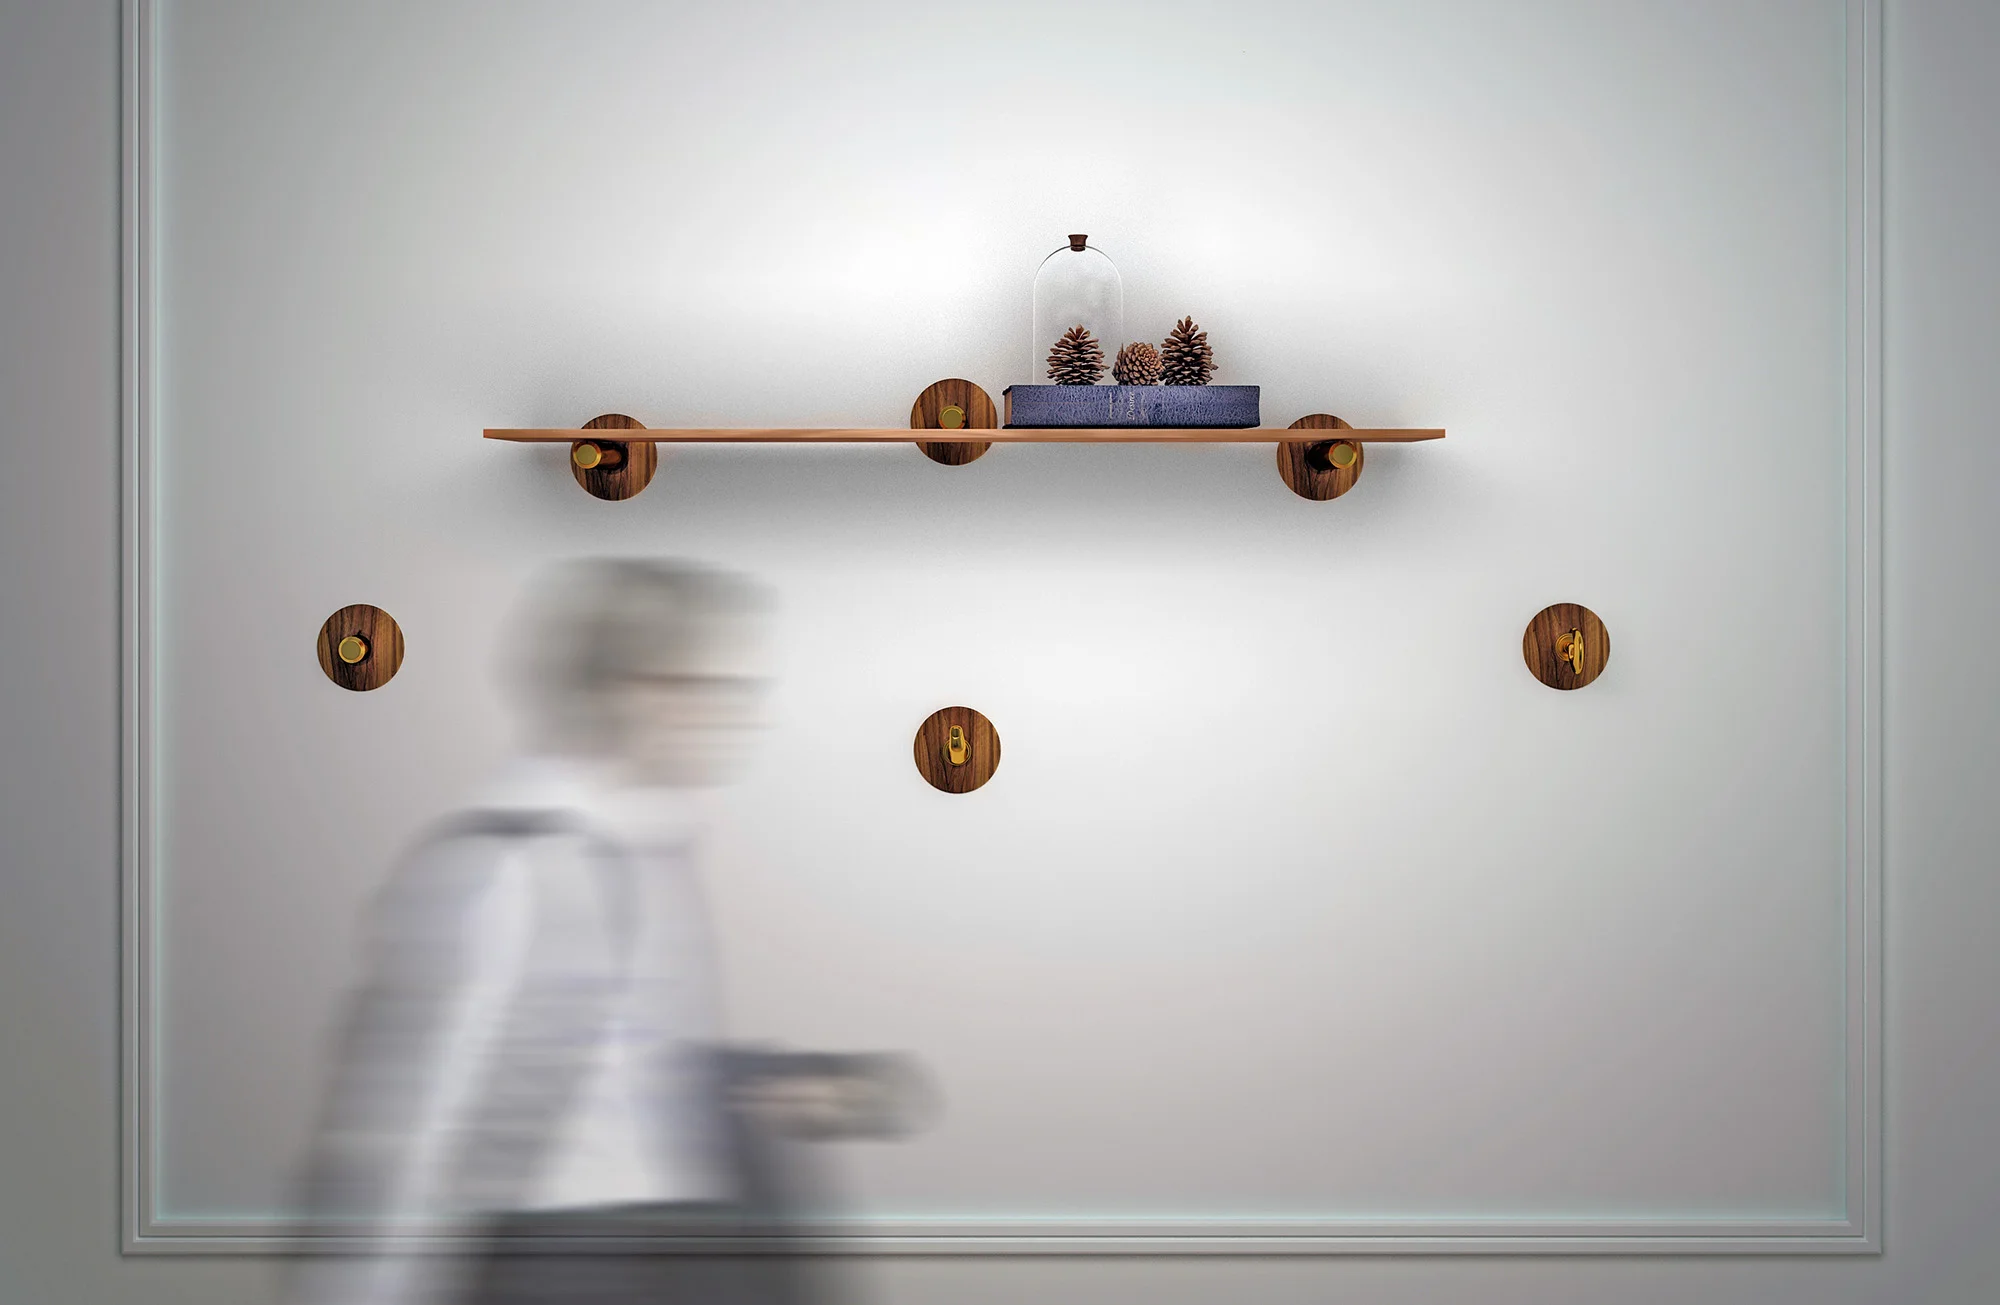
Well let’s start with The Butlers. Like every design project of mine, it went through research, to concept design, design development, detail design, and production. The research for this piece was more as a complement to the Kaleidoscope table. I wanted to create an interior that would be similar in form and material. So I researched products that would go along with a dining / conference table, and the wall hangers were a great solution to people arriving directly to this room and leaving their coats, umbrellas and bags right there. I made some drawings exploring the conic shape that connects the table top with the legs, and just as they pop out the top they would pop from the wall and have a metal piece to hang or to make a shelf.

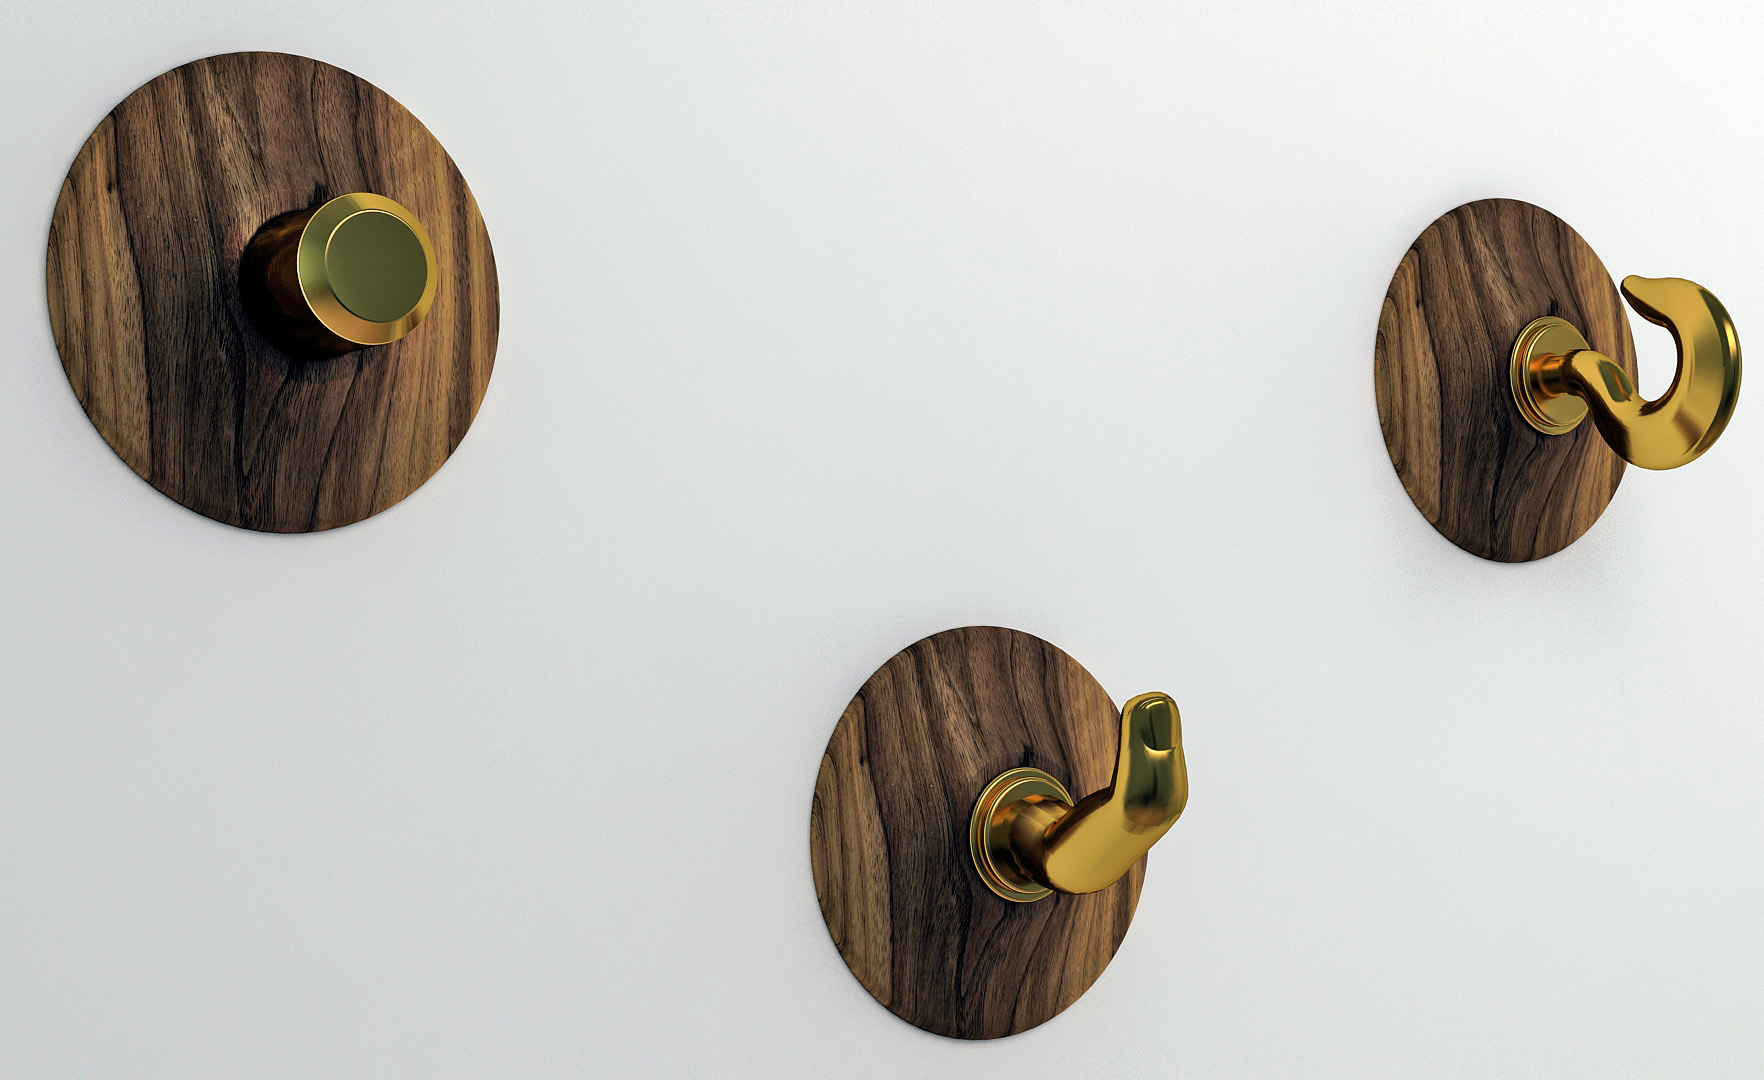
I wanted it to be just like a butler. This piece needed to be there when you needed and to be “invisible” when you didn’t. Like an adaptable system to morph it between a bookshelf and multiple wall hangers at the same time, changing to your needs. I started on the 3D simulations in detail and ambience just to feel them in a more dynamic way. Usually I give significant importance to this step because it’s where I start deciding if I should stick to the design, change it or just forget it completely. After getting to the final shape and having the technical drawings I started searching for a supplier that could do the job.
To produce this I needed a good wood lathe supplier, a metal foundry, a metal working house and a 3D printer. My luck is that living in the North of Portugal has its benefits, there are always suppliers interested in working on different projects, big or small.
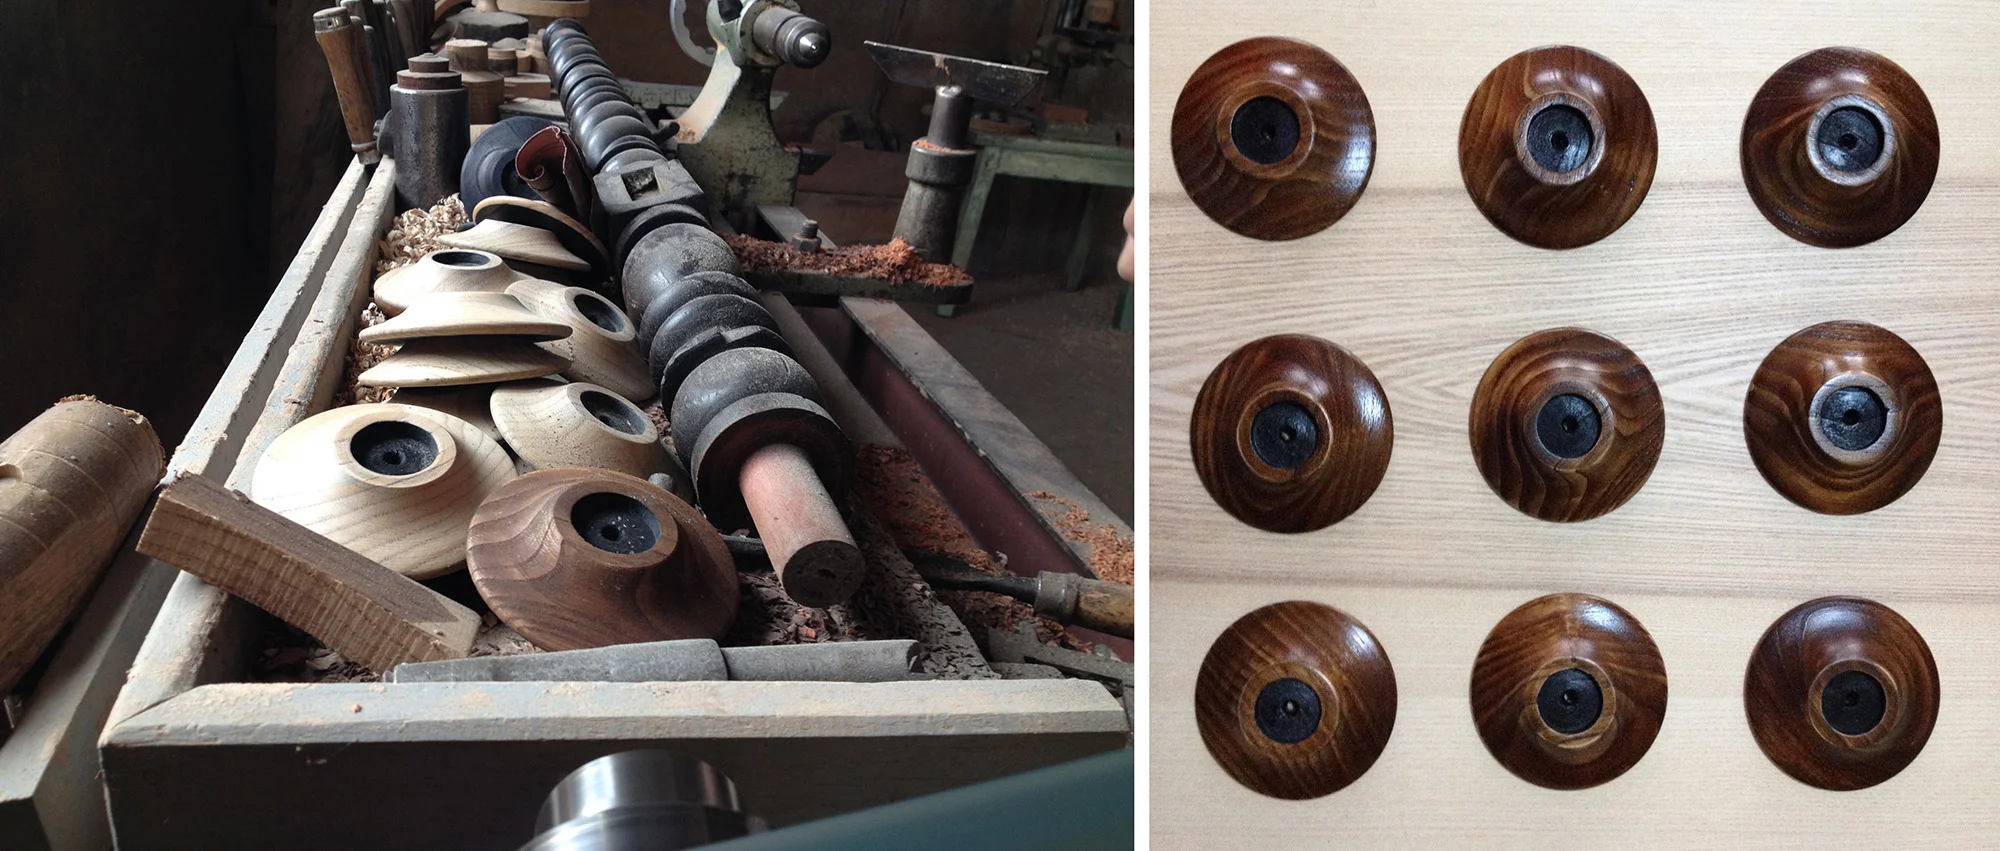
So I started with the wood lathe part, getting that first mold so I could understand how to make the piece work in a way that would sustain heavy objects and still be easily mounted and changeable in terms of the metal pieces. I had the help of my dear friend Rui Sales to find this supplier, since it was near Viana do Castelo but so deep in the mountains that we lost a considerable amount of time to find it…. But it was totally worth it. The guy was super likeable and gave me lots of insight on the project according to his knowledge of the technique. It only took one test to get it done, and he made all the changes we asked for along with the process of making it.

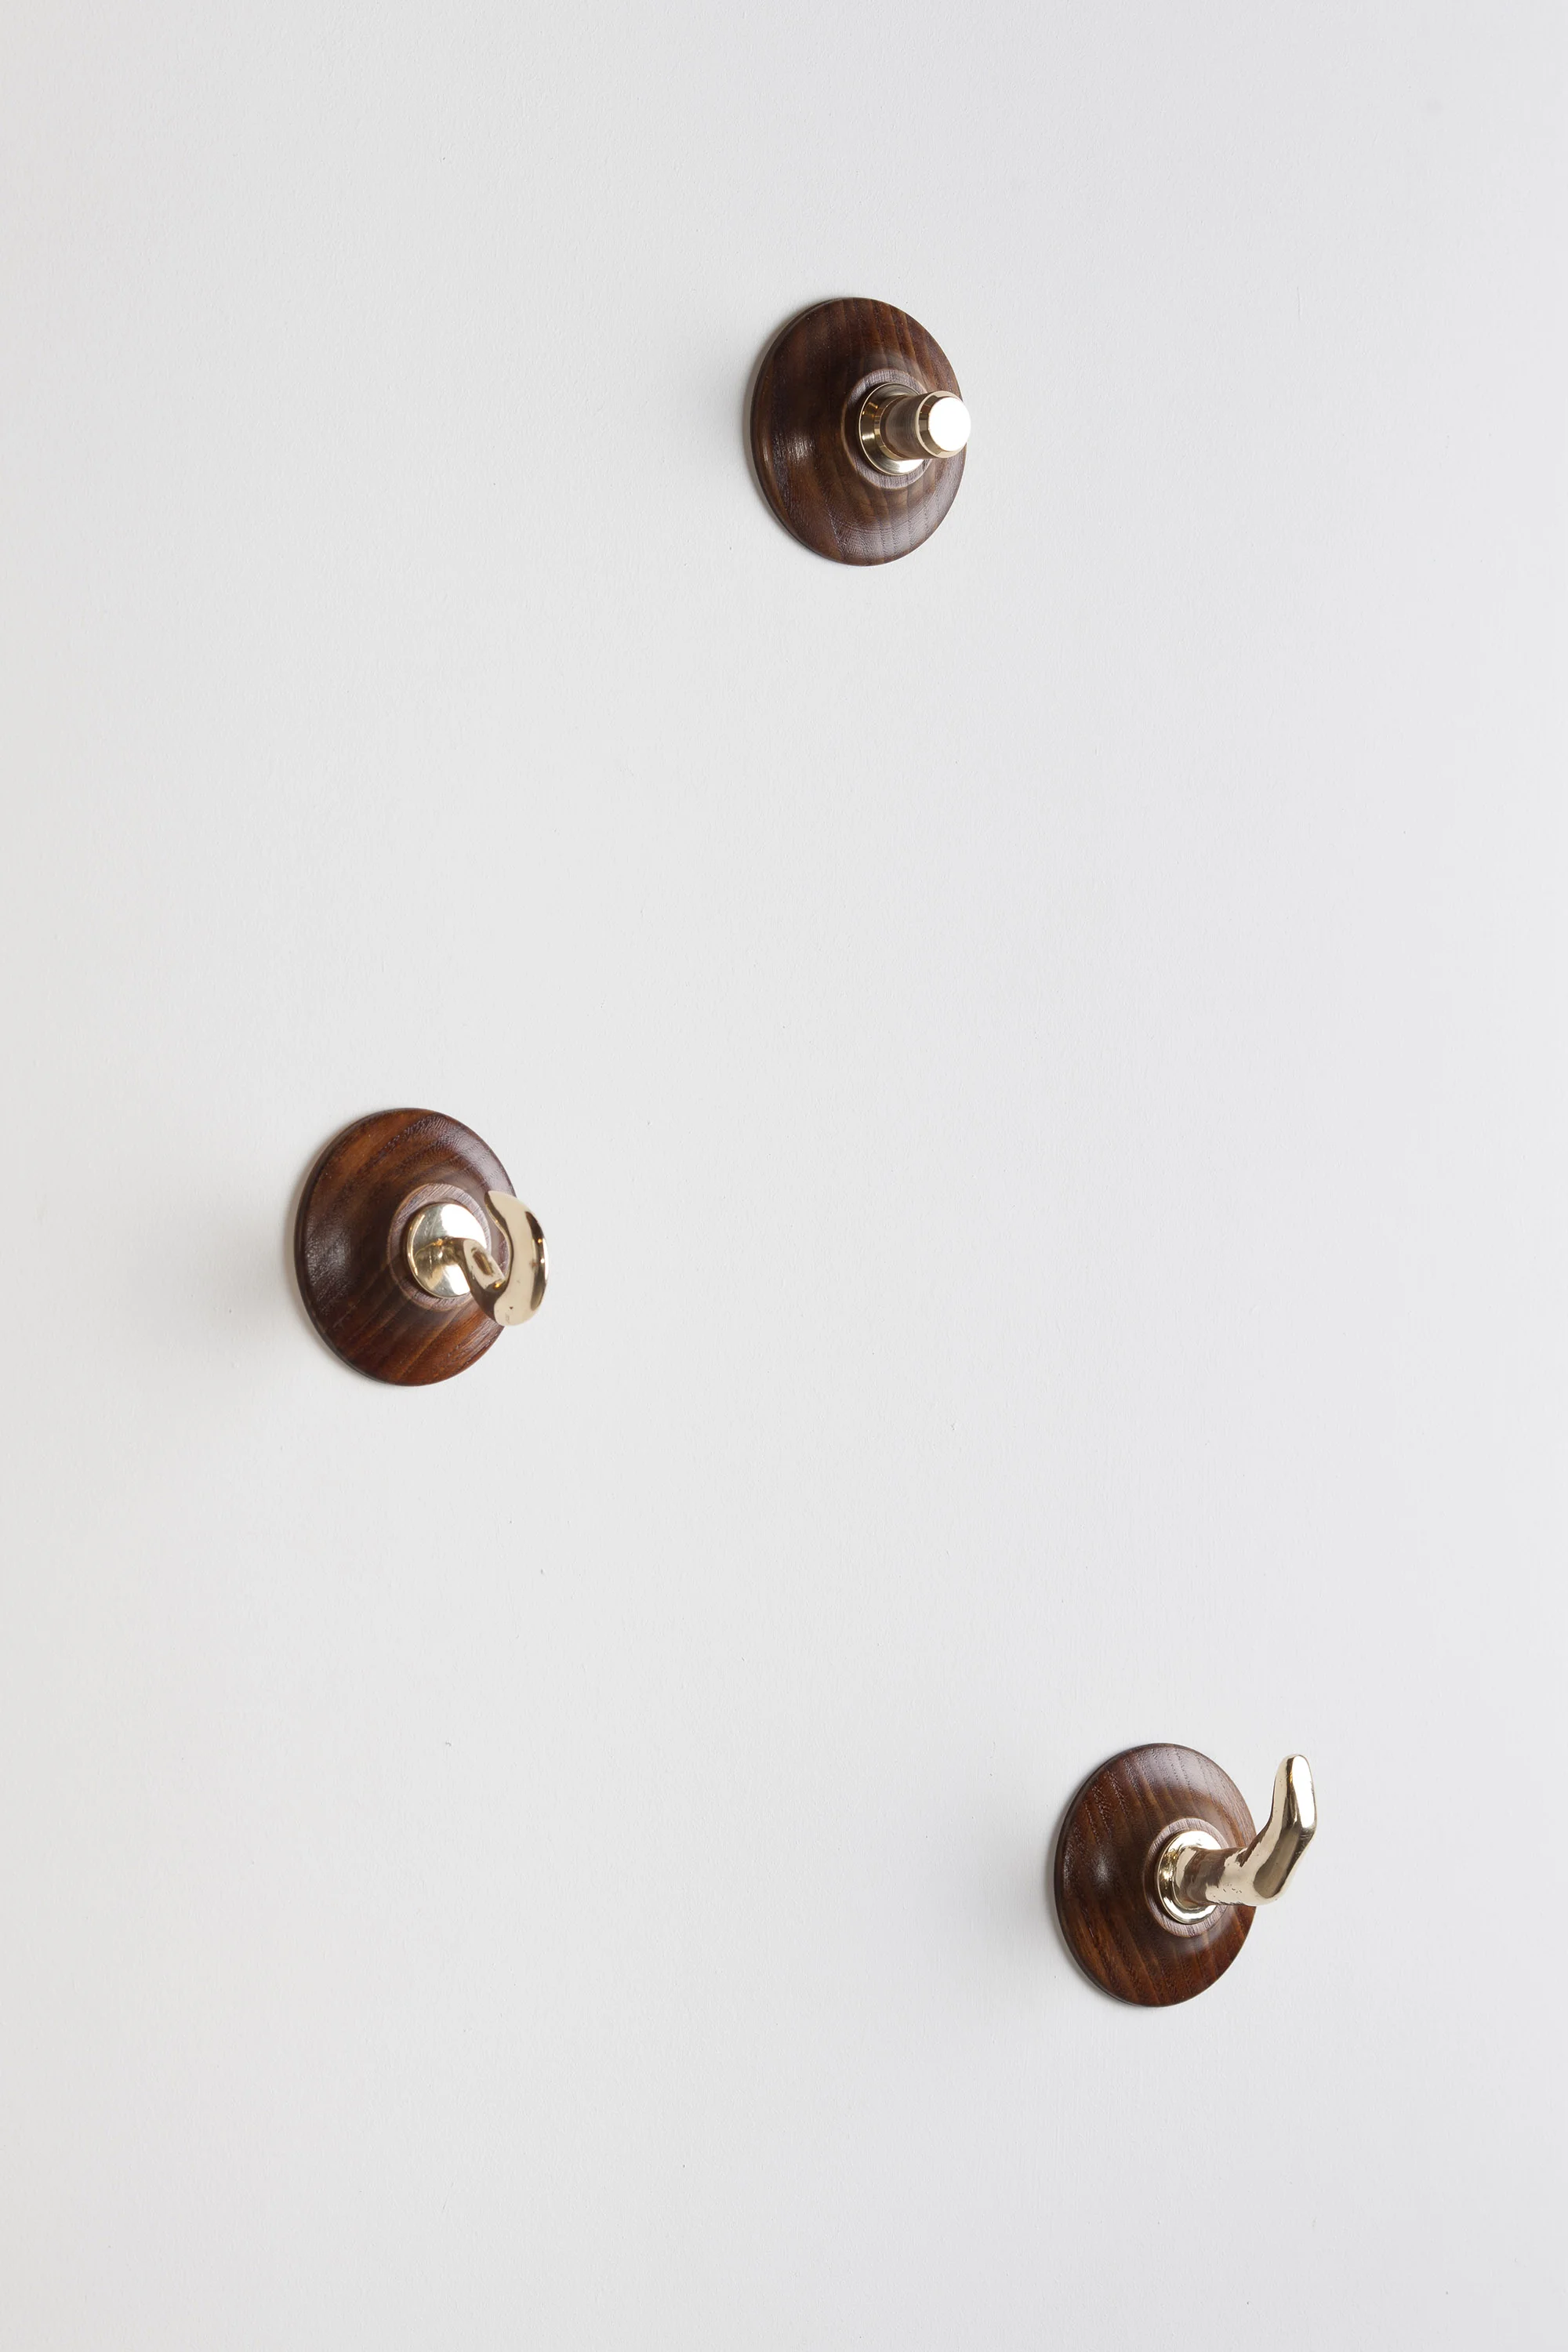
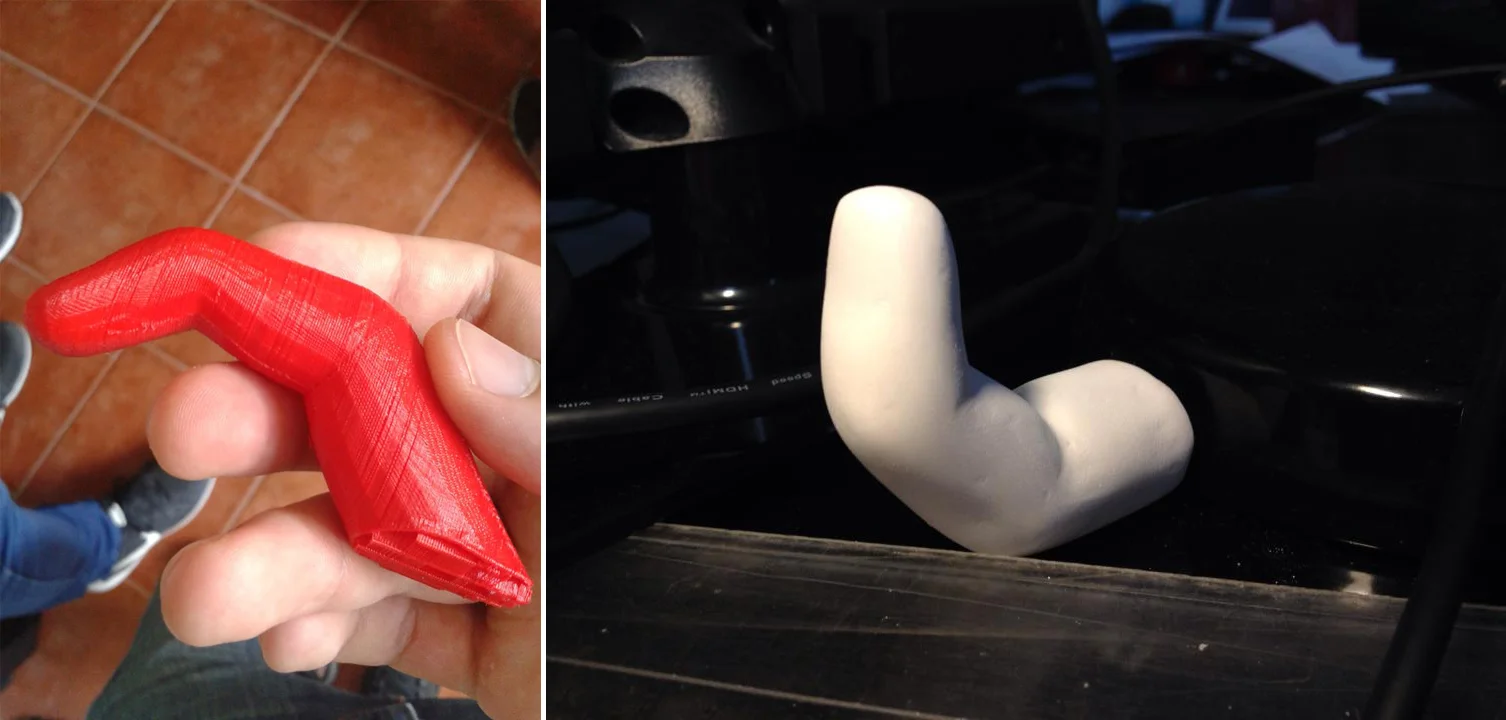
I now had something to start testing in real life, and to make sure that all the conceptual solutions were still the best ones. After that was done I started to understand how to make the metal pieces. I had three small ones as hangers, the finger, the hook and the tube plus a big one, the big tube to make the shelves. The tubes were easy to figure out, for small ones metal lathe for the big ones tubular metal. But for the finger and hook I wanted them to look exactly as the 3D mold. I could have done it from my finger and a hook that would be found in the market, but I wanted to give them a more emotional value so I resorted to a modern technique to make contrast to all the crafts techniques used along the project using a 3D printer to get them exactly has I wanted them. Usually when I 3D print pieces I start with the cheapest technique, just to get a sense of the final result, and after that I print them in HR. In this case after having the first prints I started wondering how I could give this industrial process a more crafted look, so I tested the 3d prints in stucco and wood bases to make the molds for the metal foundry. I was in love with the idea of mixing 4 different techniques (wood lathe, 3D printing, stucco, foundry) in a small piece like this that in the future wouldn’t need all of them but would still be in their DNA.
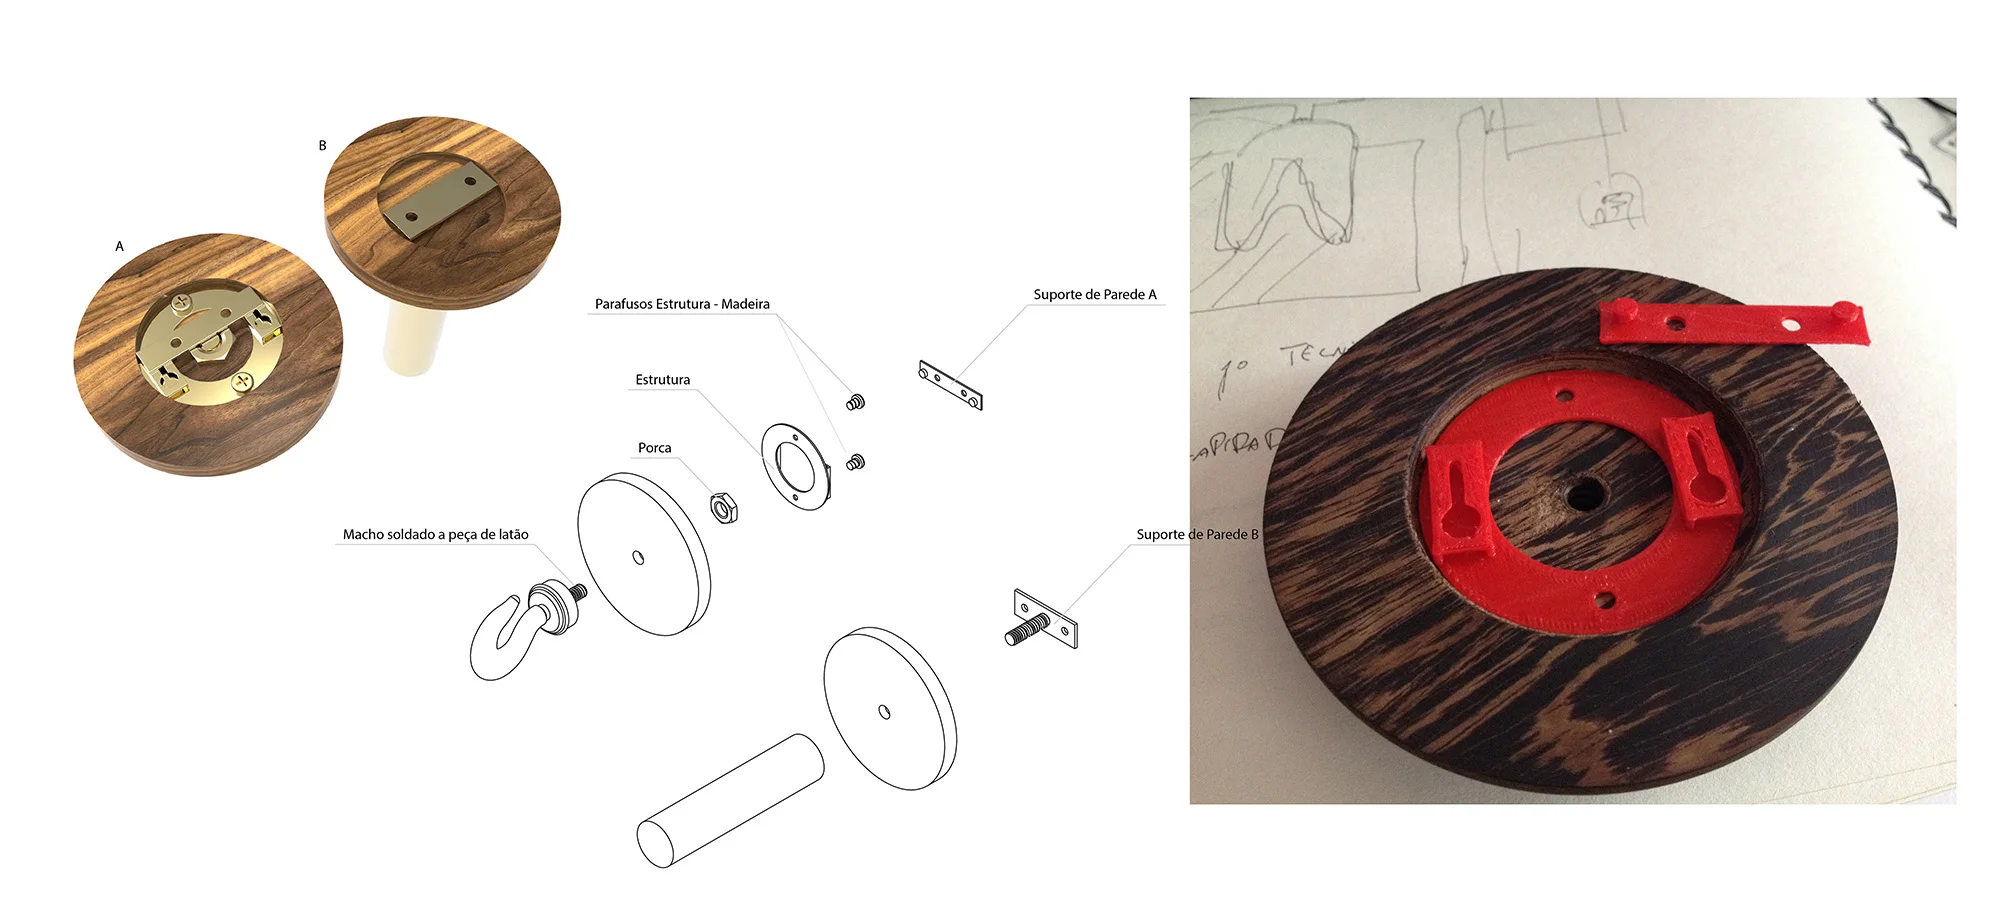

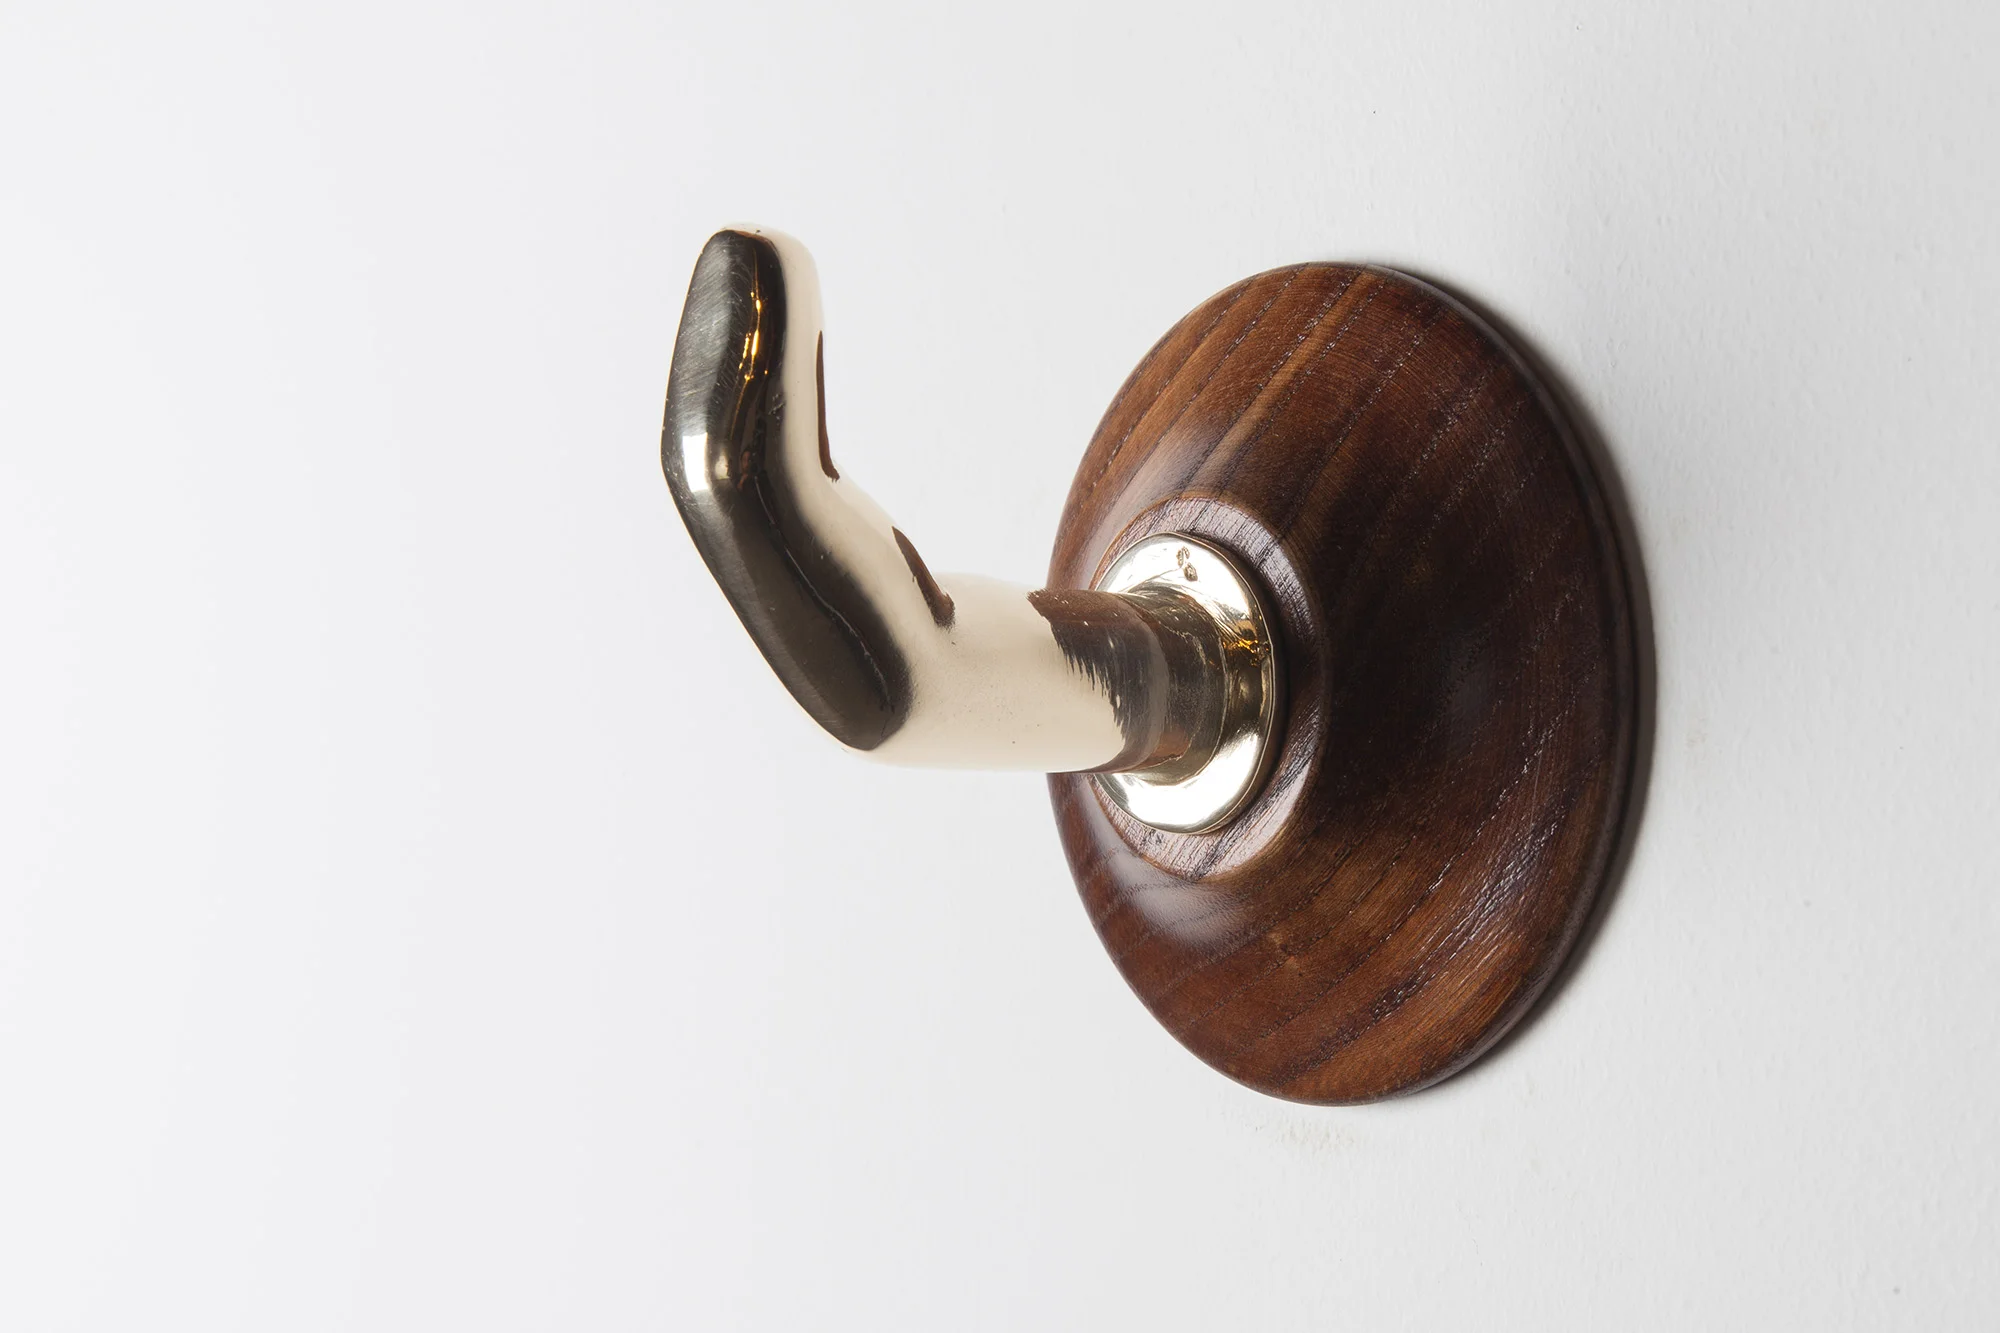
After all those things were done, I had to choose between several types of wood and how to finish them, and also take care of the foundry of the pieces. The wood and finishing part proven to be a bit more complicated than expected but after some discussions with a supplier we chosen to go with a light wood that would be easier to color in brown shades in the visible parts and black in the parts where there would be more friction.
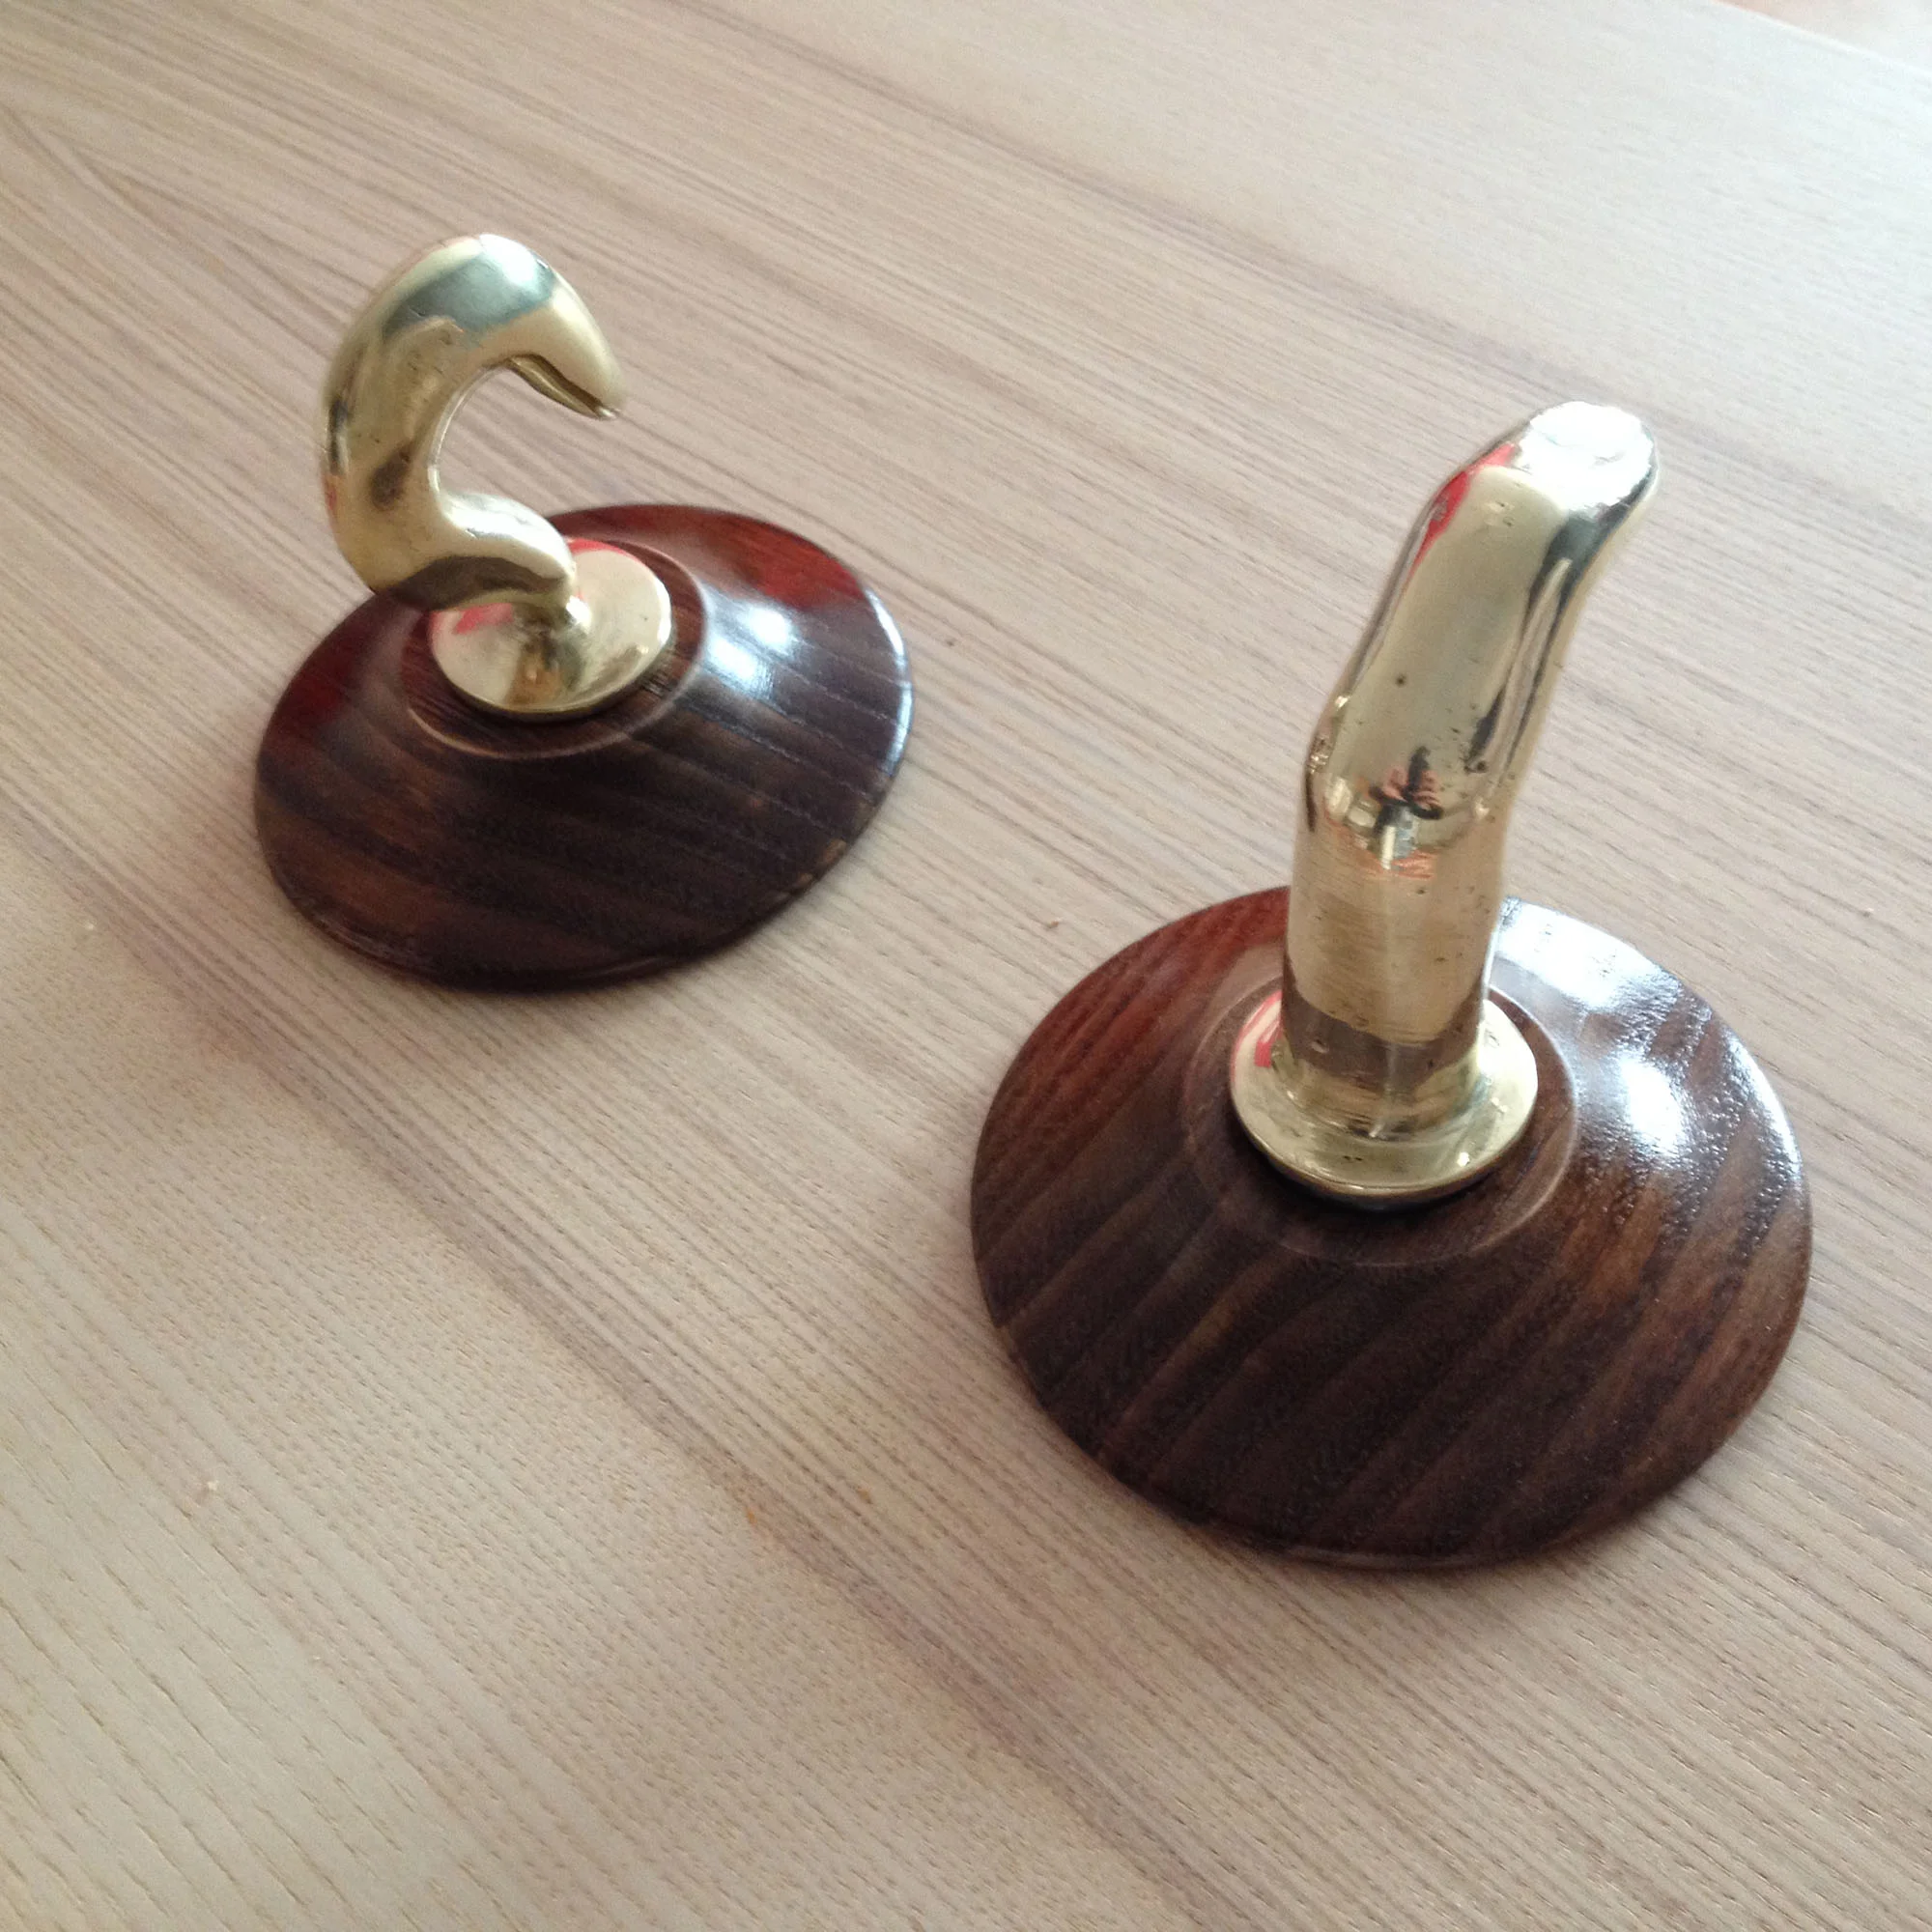
With all the pieces together we choose to make the back of it directly attach to the wall, the pieces would be screwed onto the wall piece and the wood fixed in the middle, between the wall and the metal piece. The rest of it you can see by yourself in the pictures. Next week I will try to cover the Kaleidoscope, and how it was a real race against time.